
What Is Spin Welding Plastic Welding Process Guide
Publish Data:2025.12.18 Author: Hyusonic
How Spin Welding Works – Step by Step
Spin welding (also called plastic spin welding or rotary friction welding for thermoplastics) is a process where I join two circular plastic parts by rotating one part against the other under pressure until their interface melts, then I stop rotation and hold pressure to form a solid, leak-tight weld.
At its core, spin welding is friction-based plastic welding. One part is clamped and held stationary, the mating part is rotated at high speed, and I apply axial pressure (force along the spin axis). The combination of rotational motion and pressure generates heat at the joint line, softening and melting the thermoplastic exactly where I want the bond.
Here’s the typical sequence:
Solid friction (dry) phase
- Parts are brought into contact.
- The rotating part runs at the set RPM.
- Interface temperature rises due to dry friction, but the surfaces are still solid.
- Axial pressure is controlled to avoid overheating or excessive wear before melt.
Onset of melting and unstable displacement
- As the interface reaches the material’s softening/melt range, a thin molten layer forms.
- Friction drops, torque changes, and I see a brief “unstable” phase where displacement rate is not yet constant.
- Material starts to flow, and early flash (extruded melt) may appear at the joint.
Stable displacement and molten interface formation
- Once a uniform molten film is established, the weld enters a stable phase.
- Axial movement (displacement) becomes predictable and controlled.
- I maintain target RPM and pressure so the molten interface stays consistent in thickness and temperature, ensuring a repeatable weld depth.
Forge phase (rotation stop + hold pressure)
- I rapidly stop rotation at a set weld depth, displacement, or time.
- Axial pressure is increased or held to “forge” the two molten faces together.
- This is where I lock in weld strength and eliminate voids at the interface.
Cooling, solidification, and final weld
- While I keep pressure on, the molten interface cools and solidifies into a single, continuous piece of plastic.
- Once the material has solidified enough to carry load, I release pressure and remove the part.
- The result is a permanent, hermetic weld with strength comparable to or better than the base material, when parameters are optimized.
For most circular plastic joining applications, spin welding cycle times are fast—often in the 1–5 second range per weld, depending on material, part size, and required displacement. On automated spin welder machines, this supports high-volume, low-cost production of fuel system parts, valves, caps, closures, filters, reservoirs, and many other thermoplastic components.
Key Spin Welding Process Parameters That Affect Weld Quality
Getting strong, repeatable spin welds comes down to dialing in a few key process settings. Here’s what matters most and how I look at it in production.
Spin Welding RPM and Heat Generation
Rotational speed (RPM) drives frictional heat.
- Too low RPM: slow heating, weak weld, excess cycle time
- Too high RPM: excessive flash, material degradation, warped parts
Typical RPM ranges (direct‑drive servo spin welder):
| Material | Typical RPM Range |
|---|---|
| PP, PE | 1,800 – 3,500 rpm |
| ABS | 2,000 – 4,000 rpm |
| PC, Nylon | 2,500 – 5,000 rpm |
I usually start mid-range, then tune based on weld strength and flash appearance.
Weld Pressure and Part Strength
Axial weld pressure (force) controls how the molten plastic flows at the interface.
- Low pressure: poor melt flow, voids, weak bond
- High pressure: squeeze-out of melt, thin weld, deformation
Key tips:
- Use enough pressure to maintain contact and displacement, but not so high that you crush features.
- For most consumer and automotive parts, we’re in the range of 200–2,000 lb (1–9 kN) depending on part size and wall thickness.
Weld Depth and Displacement Control
For consistent joints, I always control by displacement (weld depth), not just time.
- Set a target weld depth based on joint design (shear, tongue-and-groove, etc.)
- Use servo control to stop rotation when programmed displacement is reached
- Monitor actual vs. target depth for in-line quality checking
Rule of thumb: weld depth often runs 0.5–1.5 mm for smaller parts, more for thick walls / structural joints.
Hold Time and Cooling Time
Once rotation stops, forge pressure + hold time let the joint cool under load.
- Hold time: keeps the parts clamped while the interface solidifies
- Cooling time: avoids part distortion and “spring back” before you unclamp
Typical:
- Hold time: 0.3–2.0 s
- Additional cooling in fixture (if needed): 0.5–3.0 s
Longer times help for thicker walls and high-temp plastics (PC, Nylon).
Part Geometry and Joint Design
Your joint design and part shape can make or break weld quality.
- Use shear joints or tongue-and-groove to guide material flow
- Avoid large, thin unsupported walls prone to warping
- Add flash traps to capture excess melt and keep seals clean
Good joint design lets you use a broader process window and still hit leak-tight, structural welds.
Tolerance, Runout, and Alignment
Spin welding only works if the parts spin true.
- Runout or off-center features cause uneven heating and weak spots
- Poor fixtures = tilted parts, inconsistent weld depth, leaks
For servo spin systems, I typically target:
- Radial runout: < 0.004–0.008 in (0.1–0.2 mm) at the joint
- Concentricity/tolerance: tight enough that the full weld ring engages evenly
Proper fixturing and alignment are just as critical as RPM or pressure.
Monitoring and Control in Production
On modern servo spin welders, I always log and control:
- RPM vs. time
- Axial force / pressure
- Weld depth / displacement curve
- Torque vs. time/angle
- Cycle time and reject criteria
For higher-volume lines, I recommend a servo-controlled plastic spin welding machine with full parameter storage and traceability, like a closed-loop system similar in philosophy to this servo-control plastic spin welding platform.
Common Process Windows for Typical Plastics
Typical starting windows (direct-drive spin welding):
| Material | RPM | Pressure (kN) | Weld Depth (mm) | Hold Time (s) |
|---|---|---|---|---|
| PP | 2,000–3,000 | 1–4 | 0.7–1.5 | 0.5–1.0 |
| PE (HD) | 1,800–2,800 | 1–4 | 0.7–1.5 | 0.5–1.0 |
| ABS | 2,200–3,500 | 1–5 | 0.6–1.2 | 0.4–0.8 |
| Nylon | 2,500–4,500 | 2–7 | 0.8–1.8 | 0.7–1.5 |
| PC | 2,500–4,500 | 2–7 | 0.8–1.8 | 0.8–1.5 |
These are starting points. For U.S. production, I always run weld trials, then lock parameters and add SPC or simple go/no-go curves to keep quality tight and scrap low.
Materials Compatible with Spin Welding
Thermoplastics vs. Thermosets in Spin Welding
Spin welding is designed for thermoplastics, not thermosets.
- Thermoplastics (PE, PP, Nylon, ABS, PC, POM, PET) soften and re-melt, so they bond extremely well under friction.
- Thermosets and highly cross-linked materials will not re-melt; they usually crack, char, or delaminate instead of welding.
Best-Suited Plastics for Spin Welding
In real U.S. production environments, these are the workhorse materials for plastic spin welding:
- PE (HDPE, LDPE) – fuel parts, containers, caps
- PP – filters, pods, plumbing, automotive parts
- Nylon (PA6, PA66) – valves, under-hood components
- ABS – housings, consumer products
- PC – clear covers, technical parts
- POM (Acetal) – precision components, gears, fittings
- PET – packaging, containers, specialty components
All of these weld reliably when the joint design and parameters are dialed in on a quality spin welder machine.
Matching Melt Temperatures (The ~30 °C Rule)
For dissimilar plastics, target material pairs with similar melting or softening temperatures:
- Aim for ≤ ~30 °C (≈ 54 °F) difference in melt/softening point.
- Example: PP to PE is usually weldable; PP to PC is usually not.
- Big differences in melt temperature cause one material to overheat while the other is barely soft, leading to weak or inconsistent welds.
Fillers, Glass Fiber, and Additives
Reinforcements can be used, but they change how heat and flow behave:
- Glass fiber–filled grades:
- Higher stiffness, higher heat conduction
- Strong welds are possible, but joint design must provide enough melt volume.
- High filler loading (mineral, metal, flame retardants):
- Can make welds brittle or “chalky”
- May require more displacement and tighter process control.
- Lubricated or slippery grades (PTFE-modified, silicone, high mold-release):
- More prone to slip, less friction heat
- Often need higher pressure or redesigned joints.
Thickness and Wall Section Basics
Good spin welding depends on having enough molten material at the joint:
- Thin walls (<1.5–2.0 mm):
- Easy to overheat or distort
- Use low energy input and very controlled displacement.
- Thick sections (>4–5 mm):
- Need more energy and pressure to fully melt at the interface
- Joint design (shear, tongue-and-groove) becomes critical.
As a rule, keep wall sections uniform near the weld to avoid sink, warping, and uneven fusion.
Typical Plastic Pairs and Weld Strength (Indicative)
| Material Pair | Joint Type | Typical Relative Weld Strength* |
|---|---|---|
| PP to PP | Shear joint | 80–100% of base material |
| HDPE to HDPE | Shear / tongue & groove | 75–100% |
| Nylon 6 to Nylon 6 | Shear joint | 70–95% |
| ABS to ABS | Shear / step joint | 70–90% |
| PC to PC | Shear joint | 65–90% |
| POM to POM | Shear joint | 60–85% |
| PP to PE | Shear joint | 50–80% (heavily parameter-dependent) |
*Actual strength depends on joint design, material grade, filler content, and spin welding parameters (RPM, pressure, displacement, and hold time).
Testing Weld Strength and Integrity
For U.S. OEM and Tier suppliers, we push every project through validation, not guesswork. Typical tests include:
- Mechanical tests
- Tensile / pull tests – for joint strength vs. base material
- Torque tests – for caps, closures, round connectors
- Burst / pressure tests – for tanks, housings, valves
- Leak and hermeticity tests
- Air decay, pressure hold, bubble tests for leak-proof plastic welds
- Sectioning and visual inspection
- Check melt layer, flash, voids, and bond line quality.
When we set up a new application on our servo-driven spin welders, we always combine process data (RPM, pressure, displacement curves) with destructive testing so you get a proven, production-ready process. If you’re evaluating machines right now, you can see how we configure our spin welding machine solutions for different plastics and wall sections on our spin welding machine manufacturers page.
Advantages of Spin Welding vs Other Plastic Welding Methods
Core benefits for circular plastic parts
For round or symmetrical parts, the spin welding process is hard to beat. A spin welder locks one part, rotates the other, and uses friction to create a strong, repeatable weld. That gives you:
- Very high weld strength for PE, PP, ABS, Nylon, and more
- Short cycle times (often 1–5 seconds per weld)
- Excellent repeatability with servo spin welders and displacement control
- Easy hermetic sealing for fluid- and air-tight components
If you’re building caps, reservoirs, filters, valves, or coffee pods, plastic spin welding is usually the most efficient circular plastic joining method.
Spin welding vs ultrasonic welding
Both are fast, friction-based plastic welding techniques, but they shine in different areas:
- Spin welding wins on larger circular parts, thicker walls, and tougher materials like glass-filled Nylon or PP.
- Ultrasonic welding excels on smaller, intricate parts, non-circular joints, and multi-point welds.
We also build ultrasonic systems, so if you’re weighing ultrasonic vs spin welding, it’s common to test both. For a deeper dive into ultrasonic basics, our guide on the principle of ultrasonic plastic welding is a good reference point.
Spin welding vs hot plate welding
Compared with hot plate welding:
- Spin welding is faster (seconds vs. tens of seconds)
- Less heat exposure to the whole part, better for inserts and sensitive areas
- No hot plates to clean, less contamination risk
Hot plate welding is better for large, non-round parts and complex joint lines. For circular parts, spin welding almost always offers lower cycle time and cleaner operation.
Spin welding vs vibration welding
Vibration welding and rotary friction welding of thermoplastics share the same friction idea, but:
- Vibration welding is best for large, flat, non-round parts (instrument panels, manifolds).
- Spin welding is simpler, smaller, and cheaper when at least one part is round.
If your joint is circular and fits the machine envelope, spin welding usually gives you a lower machine cost and easier automation than vibration systems.
Spin welding vs laser plastic welding
Laser plastic welding is precise and clean, but it needs special materials (one transmissive, one absorbent) and tight fit-up. Compared to that, spin welding offers:
- Far lower equipment cost
- Less part engineering (no need for laser-grade materials)
- Higher weld strength on thicker sections
Laser is ideal when you need no visible weld and no flash. Spin welding is better when you want robust, cost-effective, leak-proof plastic welds and can accept a hidden or trapped weld bead.
Cycle time, energy use, and operating cost
For U.S. manufacturers watching takt time and energy bills:
- Cycle time: 1–5 seconds typical for many caps, valves, and housings
- Energy use: Very low, you only power a motor and a clamp
- Operating cost: No consumables, minimal tooling changes, easy to automate
Compared with hot plate, vibration, or laser systems, a servo spin welder usually lands on the low end of total cost per weld.
Hermetic sealing and leak-tight joints
Spin welding is one of the most reliable ways to get hermetic sealing in plastics:
- Strong, continuous 360° weld line
- Great for fuel, oil, coolant, water, and air systems
- Commonly used where leak proof plastic welds are mandatory (automotive, HVAC, consumer packaging)
With the right spin welding joint design and flash trap, you can hit tight leak specs while keeping the weld bead hidden.
No consumables, clean process
The spin welding process uses no adhesives, no solvents, no fasteners, no filler rod:
- Nothing to store, mix, or expire
- No chemical fumes, no curing time
- Easy to run in clean rooms and medical production
You may still choose basic fume extraction as good practice, but compared with many plastic welding techniques, spin welding is environmentally clean and operator-friendly.
Maintenance, reliability, and machine lifespan
A quality spin welder machine is built for long-term industrial use:
- Simple mechanical drive + servo control = low maintenance
- No hot plates or complex optics to replace
- Typical lifespan measured in millions of weld cycles with basic preventive care
For U.S. plants running multiple shifts, a servo spin welder or automated spin welding system gives you high uptime, predictable maintenance, and long service life, which is exactly what you want when you standardize on one plastic welding solution across product lines.
Limitations and When NOT to Use Spin Welding
Spin welding is powerful, but it’s not the right tool for every plastic joint. Here’s where I’ll usually steer customers toward a different plastic welding process.
Geometry limits: you need at least one round part
Spin welding is a rotary friction welding process. That means:
- You need at least one circular or rotationally symmetric part (caps, lids, bosses, manifolds, housings).
- Non-circular, odd-shaped, or multi-lobed parts are difficult or impossible to spin without distortion or poor weld contact.
If both parts are very irregular, vibration, hot plate, or ultrasonic welding usually makes more sense.
Very large or very small parts
Spin welding isn’t ideal when:
- Parts are too large in diameter (hard to control speed, torque, and alignment; big machines get expensive).
- Parts are very small or micro-sized (fixturing and alignment become tricky; risk of part distortion).
In those cases, ultrasonic or laser plastic welding can often deliver better control on small features and micro-joints. If you’re comparing technologies, our overview on laser welding vs ultrasonic welding lays out the trade-offs clearly.
Surface appearance and visible weld bead
If you need a flawless cosmetic surface:
- Spin welding can create a visible weld bead and flash around the joint.
- We can design flash traps / flash containment to hide most of it, but not every part has room for that.
For high-end visible parts (appliances, consumer housings), ultrasonic or laser usually wins on appearance.
Flash generation and containment
Spin welding naturally produces molten flash as material flows out of the joint:
- You’ll often need flash traps designed into the joint to keep weld flash away from seals, O-rings, or flow paths.
- If the part can’t tolerate any loose debris (certain medical or fluid-handling components), another method may be safer.
Heat-sensitive components and electronics
Spin welding generates frictional heat and vibration right at the joint:
- Embedded electronics, sensors, or delicate inserts close to the weld zone can be damaged.
- Thin walls near the joint can warp or collapse if the process window is tight.
For these applications, I often recommend laser or well-controlled ultrasonic systems that focus energy more precisely.
Design trade-offs vs other welding methods
Because spin welding needs rotation:
- You must design symmetrical joints and allow space for fixturing and rotation clearance.
- Features like asymmetrical ribs, tabs, or keyed geometries across the weld line are limited.
If your design calls for complex, multi-plane joints or heavy 3D features right at the seam, vibration, hot plate, or ultrasonic welding will usually be more flexible.
When another process is the better choice
You should strongly consider not using spin welding and instead use:
Ultrasonic welding
- Small, intricate parts
- Tight tolerances and cosmetic surfaces
- High-volume, low-mass components
- (Example: our ultrasonic plastic welder systems are built exactly for this type of work.)
Hot plate welding
- Large, flat, or non-circular parts
- Thick sections needing deep melt and long weld lines
- Applications where flash and longer cycle times are OK
Laser plastic welding
- Cleanroom or particle-sensitive parts
- Clear/transparent components
- Very tight, hidden welds with top-tier cosmetics
If you’re unsure whether spin welding fits your part, I always recommend running a quick feasibility review and, if needed, weld trials before you commit your design or tooling.
Common Spin Welding Applications and Industries
Spin welding is my go-to process whenever I need fast, leak-proof joining of circular plastic parts. Here’s where plastic spin welding really earns its keep in the U.S. market.
Automotive: Fuel & Fluid Systems
I use spin welding a lot in automotive for parts that must not leak:
- Fuel tanks and filler necks
- Coolant and washer reservoirs
- DEF/AdBlue tanks, brake fluid and oil reservoirs
The rotary friction welding process gives consistent, hermetic seals that stand up to vibration, temperature swings, and long-term fluid exposure.
Valves, Pumps & Filters
For rotary-style components, spin welding keeps assemblies tight and aligned:
- Plastic valves and pump housings
- Filter bowls, end caps, and cartridges
- Pressure-rated housings and regulators
The circular plastic joining action makes it easy to lock in O-ring grooves, sheer joints, and flash traps for clean interiors.
Medical & Laboratory Components
In regulated markets, I use servo spin welders for traceable, repeatable welds on:
- Blood and IV filters
- Diagnostic and fluid-handling cartridges
- Small valves, ports, and sensor housings
For features like energy directors or precise joint geometry, the same design thinking we use in ultrasonic welding energy directors often carries over to spin-weld joint design.
Consumer Products & Coffee Pods
For high-volume consumer goods, spin welding hits the sweet spot of speed and cost:
- Coffee pods and beverage capsules
- Float balls and level indicators
- Caps, closures, and dispensers
You get tight seals, minimal scrap, and simple tooling—perfect for U.S. contract packagers and brand owners.
Appliances, HVAC & Plumbing
I rely on spin welding where pressure, temperature, and durability matter:
- Appliance manifolds and pump housings
- HVAC condensate, refrigerant, and air manifolds
- Pipe fittings, couplers, tees, and check valves
The process handles PP, PE, ABS, PC, and more, giving robust welds for both water and air systems.
Packaging, Aerosol & Container Sealing
Spin welders are a strong fit for circular package sealing:
- Aerosol valve cups and plastic domes
- Drum and pail bungs
- Chemical and cleaning product closures
You get leak-proof plastic welds without adhesives or extra consumables.
EV, Battery & Energy Systems
We’re seeing rapid growth in:
- Sensor and connector housings
- Small fluid and coolant reservoirs
- Battery vent caps and safety covers
Servo-driven spin welders give the precision and process control needed for safety-critical EV and energy components.
If you’re working with any round or symmetric plastic part and need a fast, repeatable, and hermetic joint, a spin welder machine is usually on the shortlist of solutions I recommend.
Types of Spin Welders Available in 2026
Overview of Modern Spin Welding Machines
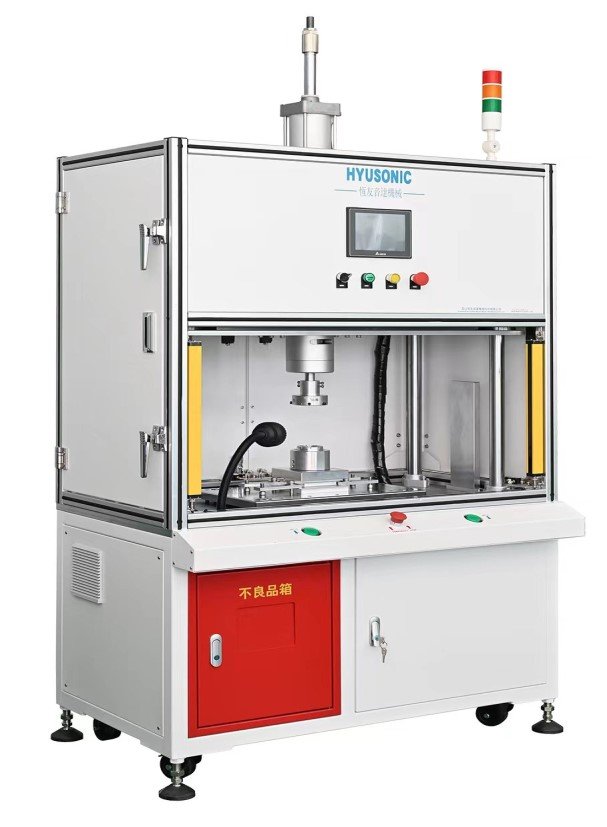
In 2026, plastic spin welding systems are faster, cleaner, and far more precise than the old pneumatic units most U.S. plants started with. Modern spin welders use closed-loop control, recipe storage, and real-time monitoring to keep every weld inside a tight process window, whether you’re welding PP caps, nylon valves, or PC housings.
Inertia Spin Welding (Energy-Storage Systems)
Inertia spin welding (also called rotary friction welding) stores energy in a heavy flywheel, then presses the spinning tool into the plastic parts until the flywheel coasts to a stop.
Best for:
- Medium to large circular parts
- Robust, repeatable welds with simple controls
- Applications where you want consistent energy per weld without complex servo motion
It’s a solid choice for OEMs that want strong thermoplastic friction welding without investing in high-end servo drives.
Continuous-Drive (Direct-Drive) Spin Welding
Direct-drive spin welding uses a motor (often servo or high-performance AC) to spin the part at a controlled RPM throughout the weld cycle.
Typical benefits:
- Tight control of RPM, torque, and weld pressure
- Easy to adjust weld profiles for different materials (PE, PP, ABS, nylon, etc.)
- Good balance of cost, speed, and flexibility for general circular plastic joining
Most standard production spin welder machines in the U.S. fall into this continuous-drive category.
Hybrid Spin Welding Systems
Hybrid spin welding combines inertia and direct-drive methods. The drive motor accelerates a flywheel and also controls motion and torque during the weld.
Why customers pick hybrid:
- High energy capability for larger, tougher parts
- Better control than pure inertia systems
- Useful when you need both high throughput and better process tuning
These systems are common in automotive and industrial plastic welding solutions where part designs vary but weld strength must stay high.
Servo-Driven Precision Spin Welders
Servo spin welders are the go-to for tight-tolerance, high-value parts.
Key control benefits:
- Precise RPM and angular positioning (important for keyed features and graphics)
- Closed-loop displacement and force control for consistent weld depth
- Easy validation and data logging for medical and automotive programs
If you’re already using advanced servo-based ultrasonic metal welders on your line, the control philosophy will feel familiar—just optimized for thermoplastic friction welding instead of metals.
Manual, Benchtop, and Fully Automated Spin Welders
You can match the spin welder to your production style instead of forcing your line to fit the machine.
- Manual / Operator-Loaded Benchtop
- Low-volume, R&D, and prototyping
- Contract manufacturers running short runs and changeovers
- Semi-Automatic Standalone Cells
- Medium-volume, quick tool swaps
- Ideal when you’re validating new circular plastic joining projects
- Fully Automated Systems
- High-volume caps, closures, valves, and filters
- Integrated bowl feeders, robots, and in-line inspection
We design spin welding tools and fixtures around your part so operators can load fast, safe, and mistake-proof.
Accuracy, Control, and Flexibility Differences
Here’s how the main machine styles stack up:
- Inertia:
- Accuracy: Medium
- Control: Low–medium (energy mainly set by flywheel)
- Flexibility: Best for similar part types and materials
- Direct-Drive (Non-Servo):
- Accuracy: Medium–high on RPM and pressure
- Control: Good, but limited on displacement profiles
- Flexibility: Strong general-purpose solution
- Servo-Driven / Hybrid:
- Accuracy: High (RPM, angle, displacement, force)
- Control: Excellent for tight tolerances and leak-proof plastic welds
- Flexibility: Best for multi-product, multi-material plants
Example Configurations: Low-Volume to Mass Production
Common setups we see in the U.S. market:
- Prototype / Lab Bench System
- Compact servo spin welder
- Quick-change tooling for PP, ABS, PC test parts
- Mid-Volume Cell
- Direct-drive spin welder with automatic clamping
- Operator load/unload + barcode tracking
- High-Volume Automated Line
- Multi-station servo spin welder integrated with conveyors
- In-line leak testing and camera inspection for 100% quality control
Whether you’re just starting with a small benchtop unit or scaling up to a fully automated spin welding system, the core goal stays the same: fast, stable, and repeatable welds that fit your production targets and quality requirements.
How to Choose the Right Spin Welder for Your Project
Choosing the right spin welder isn’t about buying the biggest machine—it’s about matching the process to your part and your numbers. Here’s how I look at it.
Match the Spin Welder to Part Size & Geometry
Start with your part:
- Small parts (caps, valves, coffee pods, fittings)
→ Benchtop or compact servo spin welders - Medium parts (filter housings, manifolds, reservoirs)
→ Standard servo or continuous-drive systems - Larger circular parts (tanks, covers, housings)
→ Higher-torque direct-drive or inertia spin welders
Key checks:
- Is at least one part round or rotationally symmetric?
- Is there space for fixturing and tooling around the part?
- Can you design a proper shear or tongue-and-groove joint?
Consider Volume & Spin Welding Cycle Time
Your production volume drives the machine class:
| Volume Level | Typical Setup | Notes |
|---|---|---|
| Prototyping / Lab | Manual or simple benchtop spin welder | Lower cost, flexible |
| Low–Medium (up to ~200/hr) | Benchtop with basic automation | Quick changeover |
| High Volume (24/7) | Fully automated servo system | Fast cycle, auto loading, data logging |
For most thermoplastics, spin welding cycle time is usually 2–8 seconds per weld, depending on size and material.
Precision, Tolerance & Traceability
If you need tight dimensional control or validation (automotive, medical, HVAC), go servo:
- Servo spin welders give:
- Closed-loop control of RPM, torque, and displacement
- Better weld depth repeatability (tight tolerances)
- Full weld traceability (data per part for audits)
If your process might also involve ultrasonic or other joining methods, it can help to review a broader joining strategy using a guide like this how to choose the right welder resource.
Power Rating & Torque for Different Plastics
Different plastics, different muscle requirements:
- Soft, low-melt plastics (PE, PP)
→ Moderate power, focus on speed and control - Stiffer plastics (ABS, PC, POM, Nylon)
→ Higher torque and power to reach target weld depth - Glass-filled or thick-wall parts
→ Need higher torque and strong fixturing
Ask for:
- Max RPM
- Continuous and peak torque
- Power rating matched to your largest, stiffest part
Budget: Benchtop vs Automated Spin Welding Systems
Rough ranges (USD, typical U.S. market):
| System Type | Typical Use | Ballpark Budget* |
|---|---|---|
| Basic benchtop spin welder | R&D, small batch, job shop | $10k–$30k |
| Servo benchtop with more control | Medium volume, tighter tolerances | $30k–$70k |
| Semi-automated workstation | Dedicated line, fixture + safety | $60k–$120k+ |
| Fully automated spin welding cell | High volume, 24/7 production | $150k–$500k+ |
*Real quotes depend on part size, tooling, automation, and data requirements.
Integration with Automation & Conveyors
If you’re in automotive, appliance, or packaging, integration matters as much as the welder:
- Confirm support for robots, pick-and-place, conveyors
- Check I/O and fieldbus options (Ethernet/IP, PROFINET, etc.)
- Plan for part presence sensors, barcode/QR, and MES link
- Make sure safety fencing, light curtains, and guarding are part of the discussion
For full production lines, we often combine spin welders with custom automation machinery to handle loading, unloading, inspection, and packaging.
When to Prototype & Run Weld Trials
Never skip trials on a new part:
- Build or 3D-print early prototype parts
- Run weld trials to:
- Confirm joint design (shear, tongue-and-groove, flash trap)
- Dial in RPM, pressure, and displacement
- Check leak-tightness and strength
- Use results to lock in the spec before you buy a large system
Tips for Achieving Strong, Consistent Spin Welds
If you want repeatable, leak‑tight spin welds, the quality is won or lost in the details: joint design, setup, and process control. Here’s how we dial it in on our own spin welding machines.
Best Joint Designs for Spin Welding
For plastic spin welding, joint design is everything:
- Shear joints
- Tall vertical wall that “shears” into the mating part
- Great for high strength and hermetic sealing
- Best for pressure parts, fuel and fluid components
- Tongue‑and‑groove joints
- One part with a “tongue,” the other with a matching groove
- Excellent for self-centering, alignment, and hiding flash
- Ideal for consumer parts where appearance matters
In both cases, keep wall sections uniform and avoid sharp internal corners to reduce stress.
Using Energy Directors and Weld Beads
Energy directors and weld beads help control where heat and melt go:
- Energy directors (small raised ribs):
- Concentrate friction heat right at the joint line
- Speed up weld start and reduce cycle time
- Improve consistency, especially on tougher materials like PC or Nylon
- Weld beads:
- Provide extra melt volume for stronger joints
- Help fill small gaps and tolerance variation
We typically use small triangular or rounded beads; oversized beads only create excess flash.
Designing Flash Traps for Clean Welds
Spin welding will generate flash, so plan for it:
- Add a flash trap (recess) just outside the main weld line
- Keep the trap deep and wide enough to capture the expected flash volume
- Use geometry that hides flash from visible cosmetic surfaces
For cosmetic parts (caps, closures, consumer housings), a well-designed flash trap is the difference between “industrial” and “retail ready.”
Proper Fixturing, Clamping, and Alignment
Strong welds need rock-solid support:
- Rigid fixturing to stop the non-rotating part from moving or flexing
- Positive location features (diameters, nests, locators) to keep the parts concentric
- Uniform clamping so pressure is even around the entire circumference
- Minimize runout and misalignment; even a small tilt can cause uneven weld depth and leaks
On our servo spin welders, we build fixtures tight to the print, then verify with runout and concentricity checks before production.
Part Prep: Clean, Dry, and Properly Handled
Contamination kills weld strength:
- Keep joint surfaces clean and dry – no mold release, oil, dust, or fingerprints
- Use lint-free wipes and approved cleaners if needed (isopropyl alcohol is common)
- Don’t touch the weld land after cleaning
- Store parts in closed containers or bags to avoid dust before welding
Moisture-sensitive materials like Nylon may need drying per resin supplier specs.
Dialing in RPM, Pressure, and Displacement
Your spin welding process window is built on three main parameters:
RPM (rotational speed)
- Too low: cold weld, weak bond
- Too high: excessive melt, flash, and deformation
- Start in the mid-range recommended for the plastic and adjust based on weld strength and flash
Weld pressure (axial force)
- Too low: poor fusion, porous joint
- Too high: squeeze-out, thin weld, part distortion
- Tune pressure to get a stable displacement curve and solid interface
Displacement / weld depth
- Control with servo displacement wherever possible
- Use weld depth as the primary control for consistent joints
- Target a displacement range validated through strength and leak tests
Servo spin welders give you the best control over RPM ramps, pressure profiles, and displacement stops, which is critical for tight-tolerance parts.
Quality Checks and Destructive Testing
Build quality control in from day one:
- In‑process monitoring:
- Weld time, RPM, pressure, displacement curve
- Alarms for out-of-window welds
- Destructive tests (by part type):
- Tensile pull or torque testing
- Burst and leak testing for fluid/air parts
- Sectioned cross‑sections to inspect weld size and bond line
- Statistical sampling:
- Regular sampling per shift or lot to confirm consistency
If you also use ultrasonic welding in your plant, you may already be doing similar pull and leak tests; these same methods work well for spin welds and complement insights from resources like this overview of ultrasonic weld strength in plastics.
Common Weld Defects and How to Fix Them
Most spin welding issues tie back to setup or parameters:
Cold weld / weak joint
- Causes: Low RPM, low pressure, short weld time, contaminated surfaces
- Fix: Increase RPM/pressure/time slightly, improve part cleaning
Excessive flash / deformation
- Causes: Too much heat or pressure, overly large energy directors or beads
- Fix: Reduce RPM/pressure, shorten friction phase, resize weld bead
Leaks / non‑hermetic joints
- Causes: Poor joint design, misalignment, uneven weld depth, gaps
- Fix: Switch to shear or tongue‑and‑groove joint, improve fixturing, tighten tolerances, use displacement control
Misaligned or eccentric welds
- Causes: Poor concentricity, fixture runout, loose clamping
- Fix: Rework nests and tooling, verify runout, improve clamping design
We design our spin welding tools and machines to make this tuning as easy and repeatable as possible, so once you lock in a good recipe, your production team isn’t fighting the process every shift.
Spin Welding FAQ
Is spin welding stronger than ultrasonic welding?
For circular parts, spin welding is usually stronger than ultrasonic.
- Larger weld area and deeper melt
- Better for thicker walls and tough materials (PP, PA, glass-filled)
- Typical: weld strengths close to base material when the joint is designed right
Ultrasonic still wins on tiny, delicate parts. For a deeper comparison, you can look at how we use ultrasonic welding in production environments.
Can you spin weld dissimilar plastics reliably?
Yes, but only within limits:
- Best when melting temperatures are within ~30 °C
- Common good pairs: PP–PP, PE–PE, ABS–ABS, PC–PC, PA–PA
- Dissimilar pairs (like ABS–PC) can work if:
- Compatible chemistry
- Close melt temps
- Joint designed for mechanical interlock
Always verify with weld trials + pull/pressure tests before committing to production.
How fast is a typical spin welding cycle time?
Typical total cycle (load → weld → cool → unload):
- Small parts (caps, valves): 1–4 seconds
- Medium housings: 4–8 seconds
- Larger parts: 8–15+ seconds
Most jobs in real U.S. production lines fall in the 3–8 second window.
Difference between inertia and direct-drive spin welding
| Type | How it Works | Best For |
|---|---|---|
| Inertia spin welding | Flywheel stores energy, spindle free-spins to weld | Simple cycles, very high weld energy |
| Direct-drive spin welding | Motor actively controls RPM during full weld | Precise control, easier automation |
We often use servo direct-drive when customers need tight tolerances and full process data.
Do spin welders need special ventilation or fume control?
Usually no special system is required, but:
- Provide basic ventilation like any plastic process
- If you weld PVC, fluoropolymers, or heavy additives, add localized fume extraction
- Always follow plant safety and OSHA rules
Most PP, PE, ABS, PA jobs run safely with standard factory ventilation.
What tolerances are realistic with servo spin welders?
With a good joint design and rigid fixturing:
- Axial weld depth: ±0.002–0.004 in (±0.05–0.10 mm) typical
- Part-to-part weld position: ±0.005 in (±0.13 mm) on most production jobs
- Angular orientation (for oriented parts): ±1–2° is very realistic
Tight tolerances depend heavily on part molding quality (runout, flatness).
Can spin welding be validated for medical or automotive use?
Yes. We routinely support:
- Automotive: PP/PA reservoirs, fuel system parts, under-hood components
- Medical & lab: filters, valves, fluid connectors (ISO 13485 / IQ/OQ/PQ environments)
Key points:
- Full process monitoring (RPM, pressure, displacement, time)
- Data logging and traceability
- DOE-based parameter development
- Standard leak, burst, and pull testing
How long does a spin welding machine typically last?
With normal maintenance:
- 10–15 years is common in U.S. plants
- Many systems run >5 million cycles without major rebuild
- Main wear items:
- Bearings
- Tooling and nests
- Pneumatic/servo components (depending on model)
We design our spin welders for 24/7 industrial duty with predictable service intervals and easy spare parts support.